Viewbank Retaining wall

Location
Completed
- 2025-04-25
Job Summary
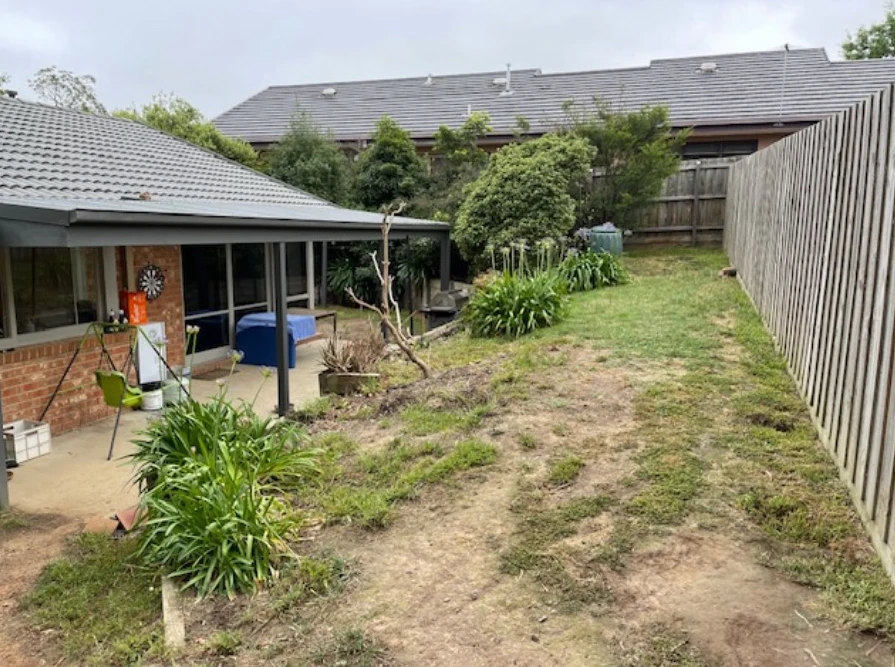
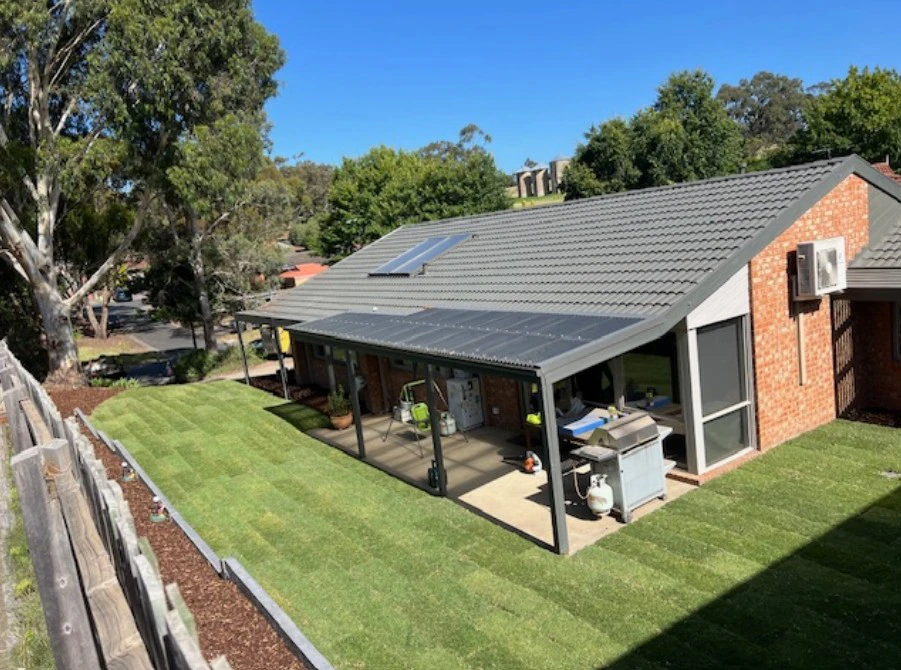
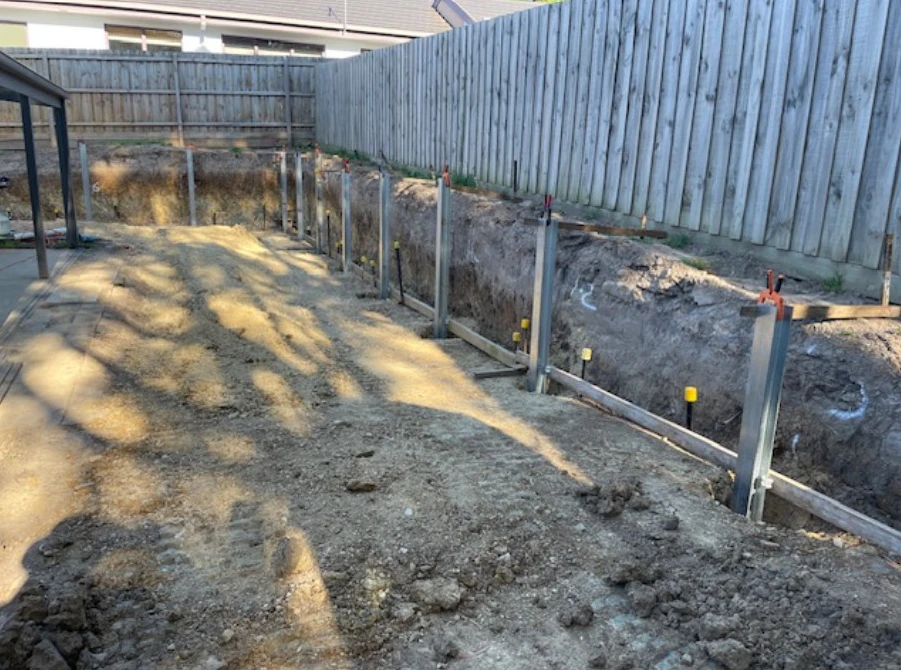
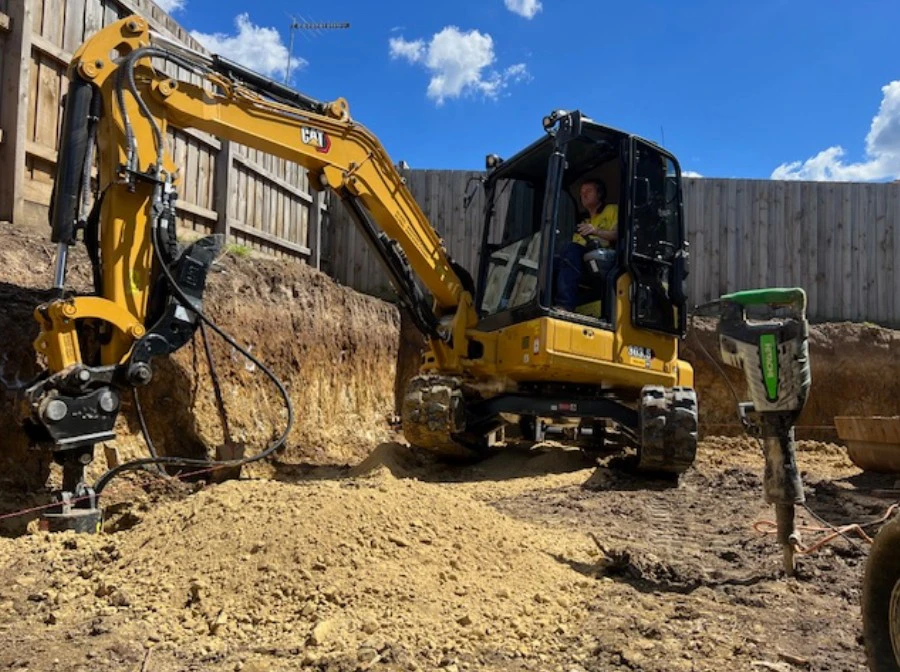
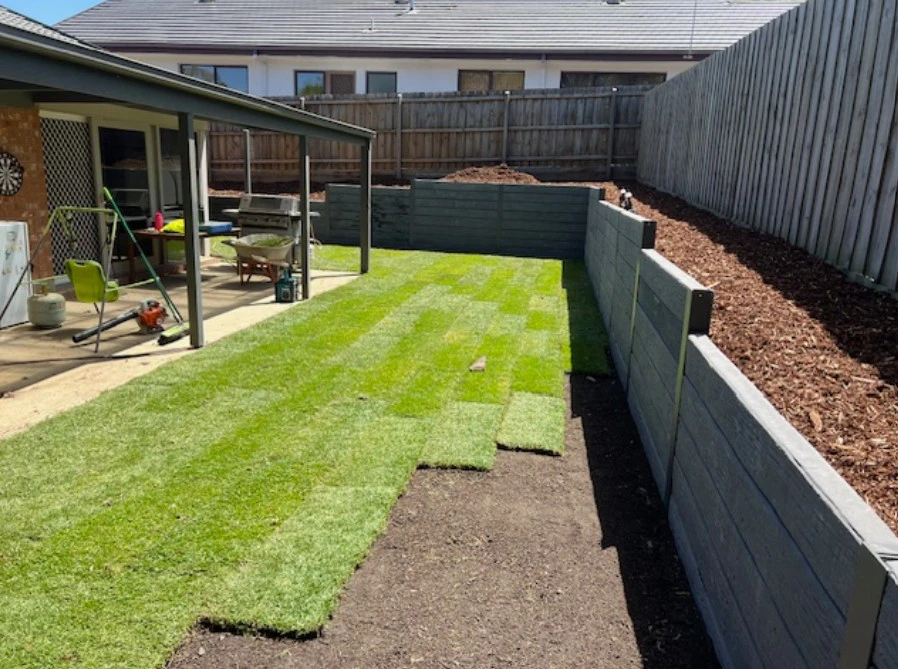
- The plan with this project was to give the homeowner more useable space in their back yard by excavating and extending the area immediately beside the home. It is common practise for the house site cut to be done 1 meter or so off the building envelope which is fine for the construction phase but often does not leave good access for the living phase. The wall specifications were completed by an engineer and relevant permits obtained before work commenced. I then set out excavating the area… Access was very limited but to be fast you get the largest machine you can into the space and the Cat compact track loader was perfect here. I started to hit very hard ground toward the bottom of the cut (foreshadowing of things to come….) but the shale was still fracturable (meaning it can be broken up) at this stage so it came out without too much trouble. The material was taken to a clean fill site to reduce the disposal cost to the client as much as possible. Once the cut was done there was heavy rain and the cut filled up ! I used a sump pump to drain the area and got saturated in the process as you can see in one of the photos. Using the specified auger size we then marked out and drilled the holes for the posts and this is where at about 1.0 m deep I hit really hard ground. Solid, shiny hard rock. The general purpose auger was not coping and things were looking grim for a while because I suddenly had to find a specialised rock auger and it was Christmas holidays ! Fortunately Auger Torque came to the rescue with a dedicated rock auger and we were able to complete the holes to depth, set and pour the posts and install the rails using a sleeper grab. A note on the sleeper grab. I only recommend using concrete sleepers for any critical wall now because the timber sleepers do not last like they used to. Concrete sleepers are great for longevity but they are really heavy. Some companies advertise them as being manageable by hand but I would strongly suggest employing a contractor with a sleeper grab to install these for you (if you are building a wall yourself) because they are very heavy and awkward to move. They can also stick in between the posts if you do not lower them level and to try and lift a stuck sleeper my hand is not fun ! Once the walls were completed I installed drainage behind the walls as per the engineers specifications, backfilled the area with topsoil for the new garden beds and then installed slotted aggi drainage to the proposed lawn area. This will prevent the new lawn from getting boggy in winter. Then it was time for a new lawn from Coolabah turf and the photos speak for themselves, it looks fantastic !